Description
Architecture / SPEC
Native correspondence is carried out at the 64-bit OS environment. It was released from memory restrictions and comfortable work environment is realized also to large scale.
– OS –
-
- Windows 7 Professional SP1 64bit
- Windows 8.1 pro (64bit)
- Windows 10 pro (64bit)
- Windows 10 Education (64bit)
– CPU / MEM / HDD –
-
- Intel Multi-Core or Multi-CPU / 4GB or more / 16GB or more
– Graphics –
-
- 3D Acceleration OpenGL board ,Recommendation nvidia ,Memory 1GB or more
– Office –
- Microsoft Excel2007 or newer
HIGH-PRECISION
“Gpcam” is the Heart and Soul of CAM-TOOL with its “Tool Path directly from the Surface Calculation” using its proprietary algorithm which allows it to achieve high-precision machining.
Figure.1In the case of “Triangulation Mesh Calculation” that many CAM systems adopt, the positional accuracy is degraded since the tool-path is generated along the Triangular shapes that are approximated from surfaces of the CAD model.
In the case of the “Surface Calculated Tool Paths” of CAM-TOOL, there is no approximation of the surface shape, so it is possible to keep the accuracy of tool-path. Since there is no gap from CAD data, CAM-TOOL’s distinguished algorithm calculates the tool contact points on the original surfaces.
Figure.2When machining by the tool-path with component points created using “chordal deviation” (tolerance in some CAM Systems), there is the possibility of considerable over-cutting (gouging) and leaving remains (stock) at particular areas with large or discontinuous curvature, and that may cause deterioration in the accuracy of the net shape.
Figure.3CAM-TOOL calculates relocation of component points of the tool-path using its special algorithm, corresponding to curvature of the shape. This calculation enables the proper relocation of component points along the shape. This also achieves an accurate tool-path that is a tremendous advantage over the other CAM Software for an accurate reproduction of the model shape.
Base & Modeling
Original kernel surface modeler is excellent for modeling in mold & die.
Surface modeling commands specialized for mold & die extract fast product model into mold model fast. It also enables reliable CAM calculation even with an imported data from any CAD.

Curvature Radius Shading
Display of different radius of shape in different colors and values help to select the tool.

Angle Shading / Draft Info
Display of different radius of shape in different colors and values help to select the tool.

Check Surface
Verifies imported surface, and detects & revises defective surfaces automatically.

Fill Hole
It’s possible possible to create surfaces easily to fill the hole made of multipule surfaces.

Create Electrode ( Option )
It extracts electrode shape from working model, and has a wide variety of functions like “Fill in blank”, “Fluctuation offset”, “Interference check”, “Process sheet” and etc. EPX format also can be output.
Modeling Other Command
- – Grill Surface
- – Taper Surface ( All Edge)
- – N-Side Compensate Surface
- – Blend Surface
- – Fill Hole
- – Fillet Surface
- Variable Fillet / 3-Tangent Fillet / SS Fillet / Corner Fillet / Chordal Fillet / Chamfer / Curvature-Tangent Line Continous / Ridgeline Fillet
- – Edit Surface
- Trim / Expand / Divide All
- – Analyze Surface
- Fillet Surface Radius Info / Draft Info / Adjacent Surface Info

Data Translate
– High quality translation for most famous native CAD systems.
Reliable data translation from other CAD systems supports a smooth translation for modeling work.
Standard
- – IGES Import / Export
- – DXF Import / Export
- – STEP Import / Export
- – STL Import
Option
- – CATIA Import / Export
- – CADCEUS Import
- – NX Import
- – UG Import / Export
- – Pro-E Import / Export
- – I-DEAS Import / Export
- – SolidWorks Pulgin
- – thinkdesign Import
2.5D CAM & HOLE
Operation integrated into 3D CAM achieves efficient and safe machining.

2.5D CAM
It’s possible to set multiple sections at the contour of wire frame and define a pocket and an island shape. Section and plane parts whitch are machined by 2-axis/2.5-axis in the surface model are detected and cutter paths are generated.

HOLE
It’s possible to set multiple sections at the contour of wire frame and define a pocket and an island shape. Section and plane parts whitch are machined by 2-axis/2.5-axis in the surface model are detected and cutter paths are generated.
2.5D CAM Cutting Mode
- – Contour Cutting
- – Round of Cavity
- – Round of Core
- – Flat Cutting
- – 2-Dimensional Cutting
- – 2.5D Rough Cutting
- – 2.5D Side Cutting
- – 2.5D Plane Cutting
- – 2.5D Re-machining
HOLE Cutting Mode
- – Canned Cycle Drilling
- – Chamfering
- – G01 Drilling
- – Circular Hole-wall Cutting
- – Circular Hole-step Cutting
- – Circular Hole Rough Cutting
- – Circular Hole-bottom Finishing
- – Helical Tapping
3D CAM
Suppress Tool load fluctuation even High speed direct cutting on high hardness steel.
Surface and Polygon calculation achieves highly precise and highly efficient machining.

Z-level Rough Cutting with Multiple Tools
This is a rough cutting mode that performs Z-level offset cutting for a raw work material. Cutter paths are automatically created using multiple tools so that the part left unmachined in rough cutting is removed with a tool of small diameter. Ball end-mill, radius end-mill and flat-end mill tools can be used in combination.

Z-level Re-machining with Multiple Tools
The remaining area is detected based on the cutter path information of the previous tool, and efficient re-machining with proper order & less retracting can be achieved.

Z-level Re-machining
This is a function that performs Z-level offset cutting for the remainders detected by specifying the tool of the previous process. Ball end-mill, radius end-mill and flat end-mill can be used.

Curve Control Along Surface
This mode cuts along 3 dimensional surfaces within the closed area enclosed by contours. U/V of surfaces don’t affect the cutter paths. Air-cut can be reduced especially for a large metal mold.

Corner Processing (Polygon)
This mode outputs “Along surface offset path” and “Contour line offset path” in the remainder regions such as groove parts or ridgeline parts where the tool of the previous process could not access. The type of the output cutter paths differs depending on the angle of inclination in the remainder region. “Along surface offset path” is output in a gently sloping area and “Contour line offset path” is output in a steeply sloping area.

Z-level Scanning-line Rough Cutting
This performs scanning-line bidirectional rough cutting at Z-level. Scanning-line bidirectional cutting reduces the connecting move, which makes it possible to shorten the cutting time. Moreover, both core and cavity shapes can be cut, and for a composite shape, the system automatically detects cutting areas and outputs cutter paths.

3D Offset Cutting
This is a finishing mode that outputs offset cutter paths along surfaces with a constant step. This mode outputs cutter paths for the entire shape in the specified area with a constant step and leaves uniform stock

Z-level Finishing
Performing Z-level cutting, which uses climb cutting, suitable for high-speed and high-precision machining, enables a high-quality surface finish required for mold manufacturing. It is also possible to cut near-horizontal areas by adding “Offset cutting”, or by using “Flat part circumference” or “Scanning-Line area” together. With a variety of useful parameters and functions like “Spiral cutting”, Z-level Finishing has been widely used from the semi-finishing process to the finishing process.

Z-level Finishing (Spiral Mode)
Z-level Finishing have a new cutting method “Spiral”. Tool path runs from top to bottom with spiral move without approach and escape. Since it reduces approaches and escapes dramatically, its cutter mark can be reduced. Tool path of offset cutting also runs with spiral move if possible.

Horizontal Area Cutting
Horizontal areas of the specified shape are automatically detected and machined. The climbing cut is always performed and cutter paths traveling around (contour line) are output. The output NC data consists of G01 with simultaneous two axes (Simultaneous three axes for slant cutting). This mode is useful for the shape, containing many horizontal areas and requiring bottom machining with a flatnose tool.

Re-machining
This is a function for re-processing the regions that were left uncut, using a smaller tool. Based on the radius of the previous tool, remainder regions are automatically detected and cutter paths are generated for those regions only. Cutting of remainder regions can be performed along ridgelines or perpendicularly to ridgelines, depending on the angle of the ridgeline.

Cutting Range ( Specify Machining Surface )
This is the method to decide the machining area by specifying a contact point between the shape and the tool. It’s possible to generate cutter paths on the only surfaces which user wants to machine.
Cutting Mode ( Surface calculation )
- – Z-level Rough Cutting
- – Z-level High Efficiency Rough Cutting
- – Z-level Finishing
- – Z-level Scan Finishing
- – Scanning-line Area
- – Flat Part Circumference
- – Horizontal Area Cutting
- – Re-machining
- – Surface Finishing
- – Aiming Check
- – CL + Check
- – Curve Cutting
- – Pencil Cutting
- – Curve Control Along Surface
Cutting Mode ( Polygon calculation )
- – Z-level Scanning-line Rough Cutting
- – Scanning-line Cutting
- – Z-level Rough Cutting with Multiple Tools
- – Z-level Re-machining with Multiple Tools
- – Z-level Re-machining
- – Corner Processing
- – 3D Offset Cutting
- – Z-level Finishing
3+2 Axis
Provides the precise 5-axis machining by the same operation as 3-axis.
“One-Setup Complete Machining” with high-precision/high efficiency. It leads to shortening delivery and reducing cost.
Multiple setups of jobs would be required when the machining couldn’t be finished from one direction. These multiple setups prevent the efficient and accurate cutting of the mold or component, because the work piece has to be manually re-positioned, re-indicated, and picked up again before machining can continue. 3+2 axis machining with “CAM-TOOL” eliminates the extra setups by machining from different directions, and improves both the efficiency and the accuracy.

Determination of Machining Direction
Provides a variety of commands such as “Undercut Check”, “Extract FlatPart”, “Angle Shading”, for determining machining direction that is needed for 3+2 axis machining. Specifying work plane for determining machining direction, plus saving and returning to the work plane setting can be done with a simple operation.

Optimization from Multiple Directions
Optimization for 3+2 machining can be performed effectively after CAM calculation. Optimizations such as “Simulation” thet includes displaying undercut areas and “Delete air-cut” by machining from multiple directions, make it possible to provide efficient and highly reliable machining data
Simultaneous 5-Axis
Provides the precise 5-axis machining by the same operation as 3-axis.
Maximizes the performance of 5-Axis Machining center without any special skills for 5-Axis Machining.
Our Simultaneous 5-Axis Machining aims at realizing high-quality surface finish by controlling the rotation axes smoothly with minimum change of the tilt axes. In our Simultaneous 5Axis Machining, 3-axis cutter paths are converted into Simultaneous 5-axis cutter paths by a “5-axis conversion function”. This is a mechanism of attaching tool vector data without changing the cutter locus. This method does not require any specific skill of Simultaneous 5-Axis Machining that has been considered a burden on operators, and it is possible to generate efficient cutter paths.

5-axis conversion function
Creates 5-Axis Simultaneous tool paths, by adding the information about tool direction to 3-axis tool paths. In converting tool paths, “smoothing control”(Youtube) adjusts the tilt axis and rotation axis to make the Machine Tool move more smoothly. It is also possible to have the tool tilt gradually before the point where the tool direction changes rapidly. These functions provide high-quality finished surfaces.

Automctic interference avoidance
Collision of Tool, Chuck and Holder with the shape can be avoided by controlling tilting axis automatically. Change tool direction gradually to avoid drastic change of tool direction. It minimizes the cutting mark.

Base surface modes
“Base surface modes” in simultaneous 5axis CAM in Version8.1 are new powerful cutting modes to create tool path on specified base surface. It achieves extreme quality surface finish by the surface calculation characterizing CAM-TOOL. It can eliminates retracts substantially, so it will also achieves to prevent the deterioration of surface finishing, and furthermore, it reduces cutting time!
Simultaneous 5-Axis Cutting Mode
- – Swarf Cutting
- – Z-level Undercut Finishing
- – Undercut Curve Control Along Surface
- – Undercut Re-machining
- – Base Surface Rough Cutting
- – Base Surface Side Finishing
- – Base Surface Bottom Finishing
Assistive
Assistive function for productivity and safety.
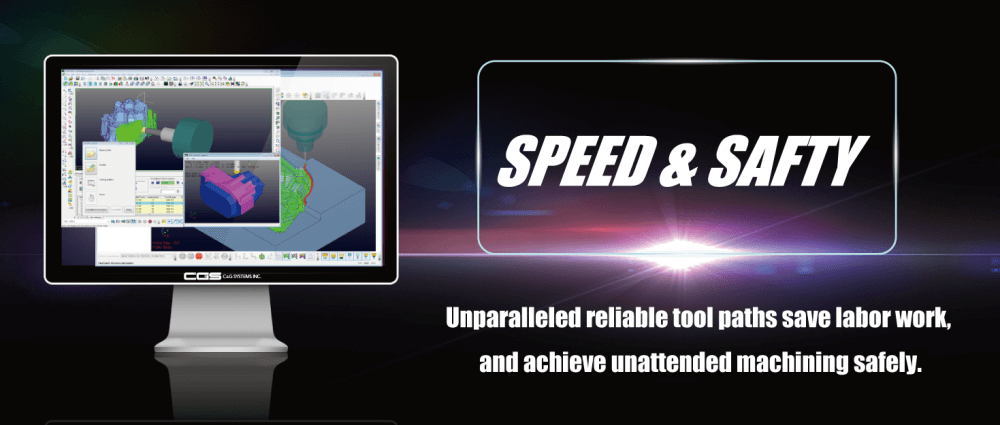
Unparalleled reliable tool paths save labor work, and achieve unattended machining safely.

Tooling DataBase
Tooling DB manages Tool, Holder and its cutting conditions. It can define Tool shank shapes flexibly, such as multi-tapered or radius shank, enabling more accurate interference-check.

Template / CAM EZ Launcher
Template, the function to register machining-pattern, and CAM EZ Launcher, which simplify the CAM operation significantly, enable to standardize and reduce CAM processes.

Optimaization / Cutting Animation
Working with Tooling DB, more efficient and safer cutter paths can be created by “Interference-check”, “Delete air-cut”, “Variable feed-rate”, etc. The machining results also can be verified by interactive animation.

Check Overcut / Remains
The result of comparison between the simulated solid of the selected process and the product shape solid is displayed.

CL Editor
With a User Friendly GUI, it’s possible to edit and check various types of CL.

Machine Simulation ( Option )
Possible to detect CL interference against the component parts of machine-tool, and verify stroke-range for each axis. Utilizing the same GUI as “Simultaneous 5-axis Editor” provides the consecutive and user-friendly environment for easy operation.
Peripheral solutions for automation and labor saving.

Process sheet
Process sheet or tool list can be output when NC data is created.

OM Inspect ( Option )
This is the command for inspecting the machining precision directly on a machine. Accurate inspection is possible by using the same system for both creating machining data and setting points to inspect. Efficient inspection is possible, and outputting an inspection result into a file is also available.

Post processor
Using the NC Machine Parameter File format,the major CNC controller are available. NC data can be output by simple settings.
-
5-axis positioning compliant
Tool Center Positioning Control / Tilted working plane command
-
5-axis Simultaneous compliant
Tool Center Positioning Control

VERICUT I/F ( Option )
Vericut interface provides seamless operability from CAM-TOOL to Vericut. It starts from Vericut Icon in CAM-TOOL then exports data of tooling (tool and holder), NC program name, tool number into Vercicut automatically. Especially, at the simultaneous 5-axis machining, it will realize safe and effective machining by checking all of interference of machine tool.


Reviews
There are no reviews yet.